Wednesday, 29 April 2020
Sunday, 26 April 2020
Saturday, 18 April 2020
How to deploy your Node.js / MongoDB app to the web, using Heroku
About this article
This is not a full guide with explanations of what is happening at each step.
This is a cheatsheet to serve as a reference of all the commands you’ll need when pushing your Node.js / MongoDB app to Heroku.
Note: This guide assumes you have already set up git. If you have not, google "How to Set Up Git for an Existing Project"
This article only deploys the backend Node.js + MongoDB to Heroku. If you have a front end app, please see another article.
Make sure you have the file package.json in the root folder of the repo.

Set up your Procfile
Before pushing to Heroku, we’ll have to create a file called Procfile, that lets Heroku know how to run your website. Go to your project repo and create that file in the root of the repo:
$ cd ~/projects/path-to-your-project-folder
$ touch Procfile
Inside Procfile add the following:
web: npm run server:dev// note this instruction is tell Heroku how to run your app. // your file can be //web: npm run start//or //web: node server.js//dependant on what your package.json
Set up your Heroku project
If you don’t have one yet, create a free Heroku account. It’s a free service — but you may need to input your credit card details to sign up or add some Add-ons.
Install the Heroku Command Line interface if you have not already. (Google how to install)
Create a Heroku app and name it:
$ heroku create your-project-name
run heroku git:remote -a your_project_name
to add your repository to Heroku git
Check that it worked by running the following command:
$ git remote -v
You should see something like this:
$ git remote -v
heroku https://git.heroku.com/unique-project-name.git (fetch)
heroku https://git.heroku.com/unique-project-name.git (push)
origin git@github.com:nsafai/Your-Git-Repo.git (fetch)
origin git@github.com:nsafai/Your-Git-Repo.git (push)
4、set run environment( tell Heroku what your app language is )
Push your Procfile to Heroku
$ git add .
$ git commit -m “setting up to push to Heroku”
$ git push heroku master
Spin up a Server
Assign a free server to run the website:
$ heroku ps:scale web=1
Set up your Production Database
Create a database to host your production data:
$ heroku addons:create mongolab:sandbox
Read Heroku carefully, you may need a credit card detail to continue. The sandbox may be free but check carefully before you continue.
When you were successfully done this, you should see

Click mLab MongoDB, you were able to see this, give you the detail of your remote database.

If you haven’t already, make sure your app.js or server.js file has the correct line of code to connect to your production DB:
// get env variable MONGODB_URI
Make sure your MONGODB_URI is correct with username and password, you can use
heroku config:get MONGODB_URI
to check.
You can use mongo shell to check your username and password ok to connect.
mongo ds053148.mlab.com:53148/heroku_dshp4qwf -u <dbuser> -p <dbpassword>
If there has no authentication problem, you can refactor your connect code.
// app.js or server.js// You may need this line to get the Environment variablesrequire('dotenv').config();const url = process.env.MONGODB_URI || "mongodb://localhost:27017";// you may hard code the link, but not recommond//const url = "mongodb://admin:123456uk@ds053148.mlab.com:53148/heroku_dshp4qwf";MongoClient.connect(url).then((client) => {// const db = client.db('covid_19');const db = client.db('heroku_dshp4qwf');const needsCollection = db.collection('needs');const needsRouter = createRouter(needsCollection);app.use('/api/needs', needsRouter);}).catch(console.err);const port = process.env.PORT || 3000;app.listen(port, function () {// console.log(`App running on port ${ this.address().port }`);console.log(`App running on port ${port}`);});
Note: you may need to install the dotenv npm package for the above to work correctly:
- run
npm install dotenvoryarn add dotenv - import dotenv at the top of your app.js / server.js file:
// app.js or server.js
require('dotenv').config()
// REST OF YOUR CODE
Configure your port settings
Set the port to Heroku’s production port. In your app.js file (or sometimes, bin/www/server.js file), change your app.listen to the following:
// At the bottom of app.js or server.jsconst port = process.env.PORT || 3000;app.listen(port);// the code above should be directly above: 'module.exports = app;'
Push your code up to GitHub:
$ git add .
$ git commit -m “setting up to push to Heroku”
$ git push origin master
Push your code up to Heroku:
$ git push heroku master
Push your .env variables to Heroku (if you have any):
For each env variable, you can push it up using:
$ heroku config:set DATABASE_URI=database_uri_here
Or, if you find it easier, you could go to https://dashboard.heroku.com/apps/YOUR_APP_NAME/settings and provide .env variables via Heroku’s web interface.
That’s it, go check if it worked!
Cross your fingers and see if it worked by using the command:
$ heroku open
🥂🎉🎊🙌🔥 Your app is on the web! 🔥🙌🎊🎉🥂
Oh no! Are you seeing this page?

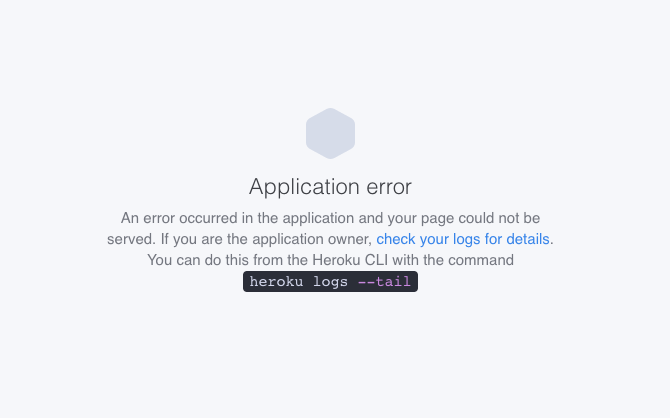
If you see the screen above, run this command:
$ heroku logs --tail
Scroll up to the top of the error logs and google them one by one.
If you get stuck and can’t resolve the problem using Google, comment below with your situation and what you’ve already tried and I’ll do my best to help.
Wednesday, 1 April 2020
npm install error
 n
n npm i fsevents
it’s node_module that vue or webpack is dependent on. It maybe was already installed as an incompatible version.
Subscribe to:
Comments (Atom)